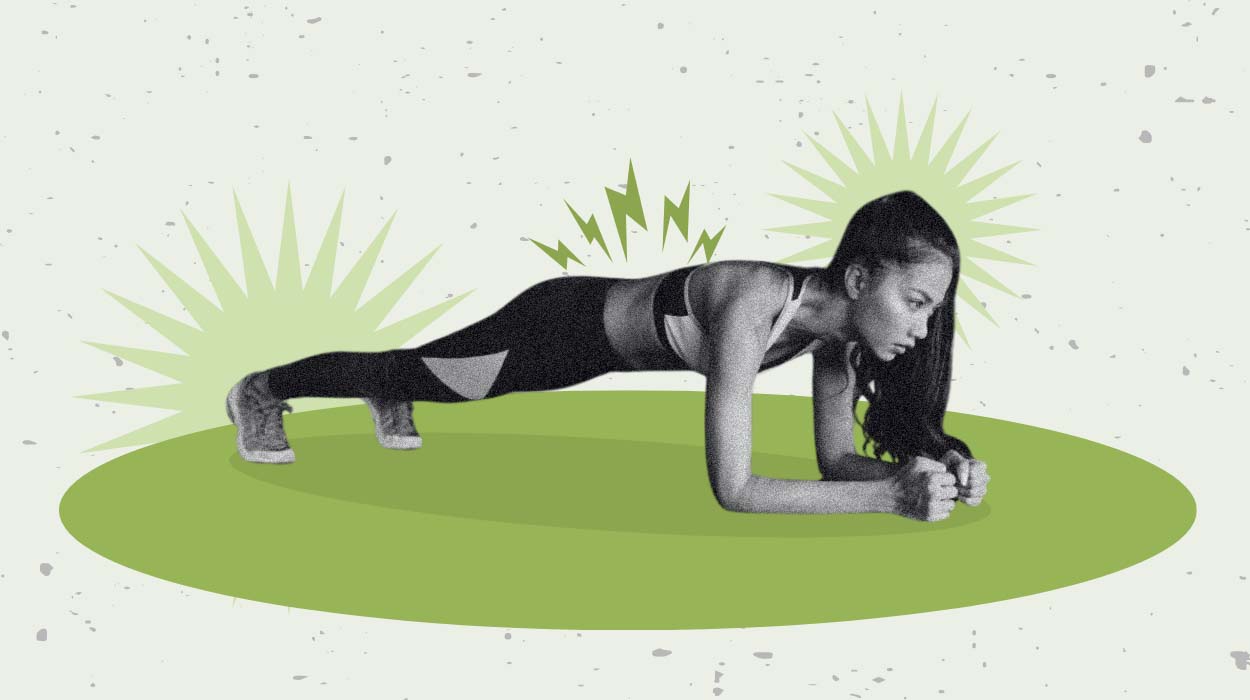
When it comes to the best ab exercises, planks, and crunches always seem to be at the top. But which one is better, and what are the reasons for it?
It’s time to dive into the crunches vs planks debate and figure out which one is better than the other.
Crunches Vs. Planks: Core Exercises Comparision
Crunches are amazing for your abs, but planks work your entire body, making them a better exercise overall. They activate your abs, that’s for sure, but they also activate all other muscles in your body. The more you hold a plank, the greater the activation and the more work your muscles have to do to stay in the right position.
Planks Vs Crunches: Are Planks Better Than Crunches?
Crunches are an amazing exercise for rectus abdominis activation as they completely isolate the abs and have them working hard without other muscles taking over. They can be done anywhere, anytime, and after only a few sets, your abs will be burning.
The difference between a plank and a crunch mostly has to do with muscle activation, as when you’re performing a plank, you’re using your whole body. When you’re doing crunches, you’re isolating your abs.
There are variations of crunches that can activate other muscle groups as well, but neither has you working your whole body like a plank. That’s why plank is the overall better exercise.
How To Properly Do A Plank
Before adding it to your workout routine, make sure you know how to properly perform a plank as it can be tough on your lower back and hip flexors.
- Start in an all-fours position, palms, and knees on the floor.
- Make sure your palms are stacked right under your shoulders and your knees right under your hips.
- From here, tuck your toes and extend your legs, activating your quadriceps muscles.
- Lift your belly button up and close your ribcage, activating your entire core, not just your abs.
- Push the ground away from you and make a little concave with your upper back, filling out the space in between your shoulder blades.
- Gaze down or straight ahead of you to protect your neck and keep your hips from collapsing or lifting.
- Hold for a specific amount of time you’ve allocated. When you feel yourself starting to shake, push the ground away from you even harder, both with your palms and your feet.
- You can always modify by dropping your forearms on the floor and pushing through a larger surface.
Plank Variations
A basic, regular plank does plenty for your strength and endurance already, but there are plenty of variations you can try and challenge yourself even more. Check out some of these plank variations:
Side Plank
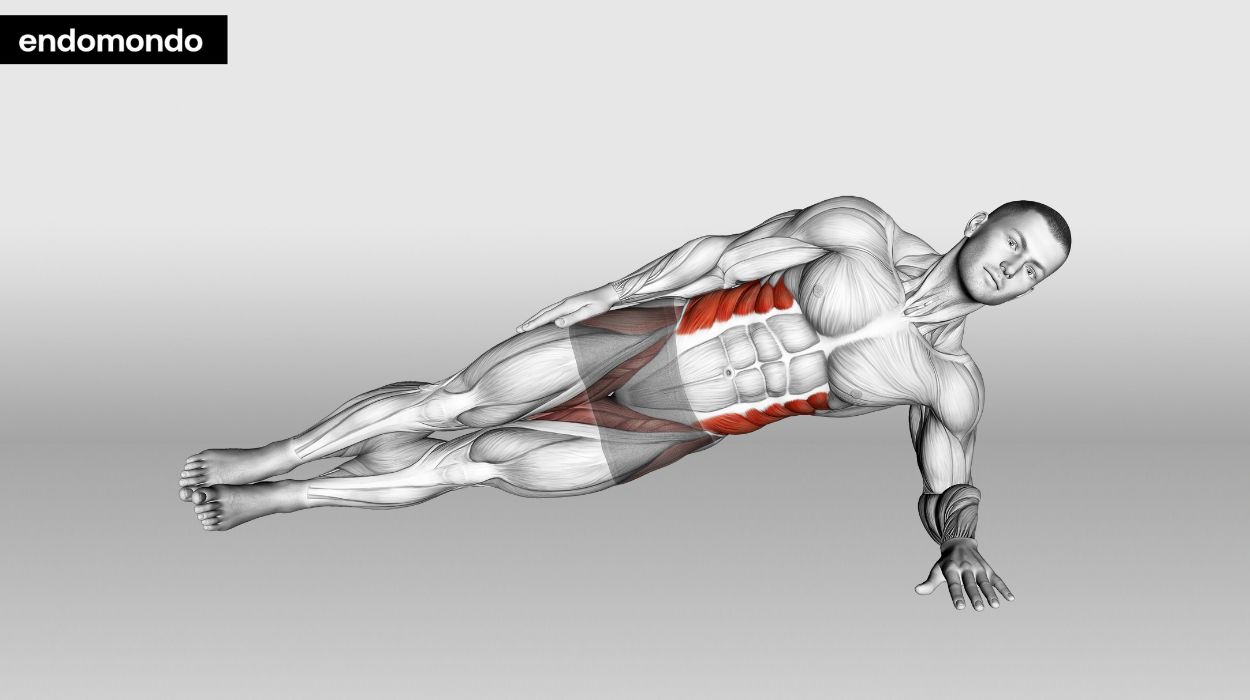
A perfect way to work your oblique muscles and your entire side body is through a side plank.
How to do:
- Starting in a regular plank position, place one of your hands in the center of your body and pivot on the same-side leg, stacking the other one on top.
- Push through the outer part of your foot to lift your hips and elevate your other arm straight toward the sky.
- Additionally, you can always modify it by lowering down on your forearm.
Tips:
- Maintain a straight line from head to heels to ensure proper form.
- Keep your core and glute muscles engaged to stabilize your body.
- Breathe steadily while holding the position to stay relaxed and focused.
Optimal Sets & Reps: 3 sets of 20-30 seconds on each side
Walking Plank
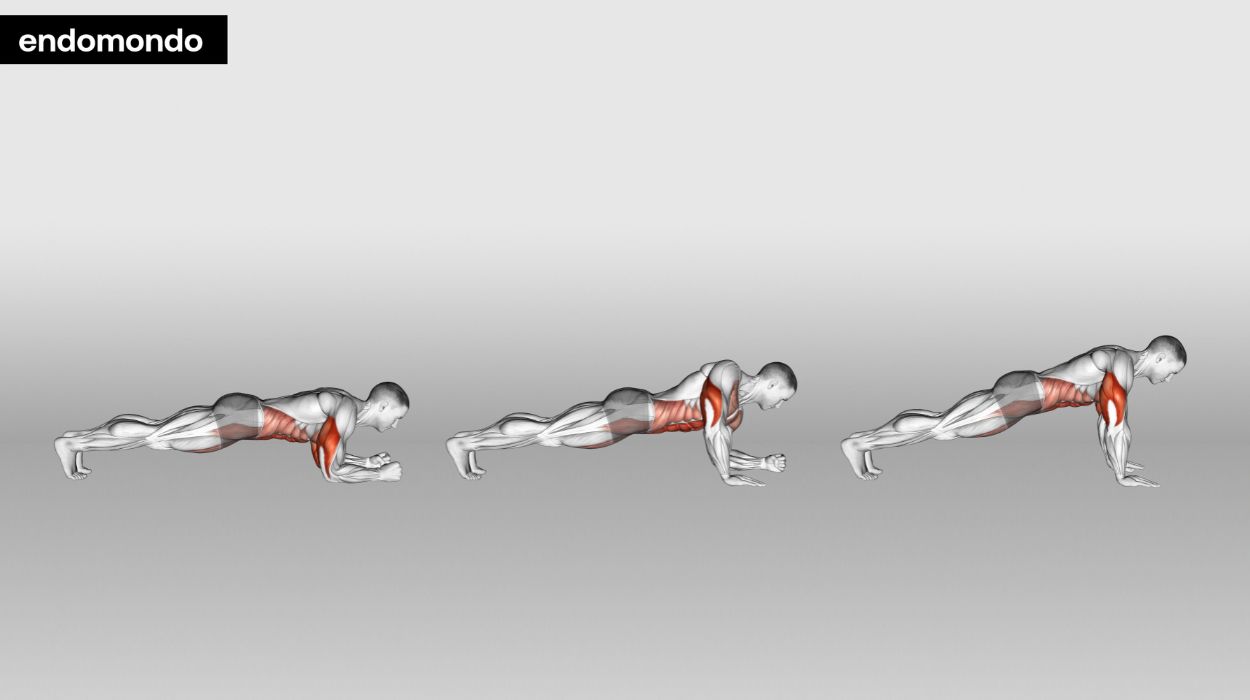
Take your plank on a walk and further challenge your entire body.
How to do:
- Starting in the basic position, start moving your hands and feet at the same time, maintaining the position.
- Avoiding lifting or dropping the hips is the real challenge as it makes your abs burn, activating them to their core.
- You can move forward, backward, or side-to-side.
Tips:
- Keep your core muscles engaged throughout the movement for stability.
- Alternate between walking on your arms (hands) and elbows while maintaining a plank position.
- Take slow, controlled steps to prevent swaying and maintain balance.
Optimal Sets & Reps: 3 sets of 10-12 steps
One-Legged Plank
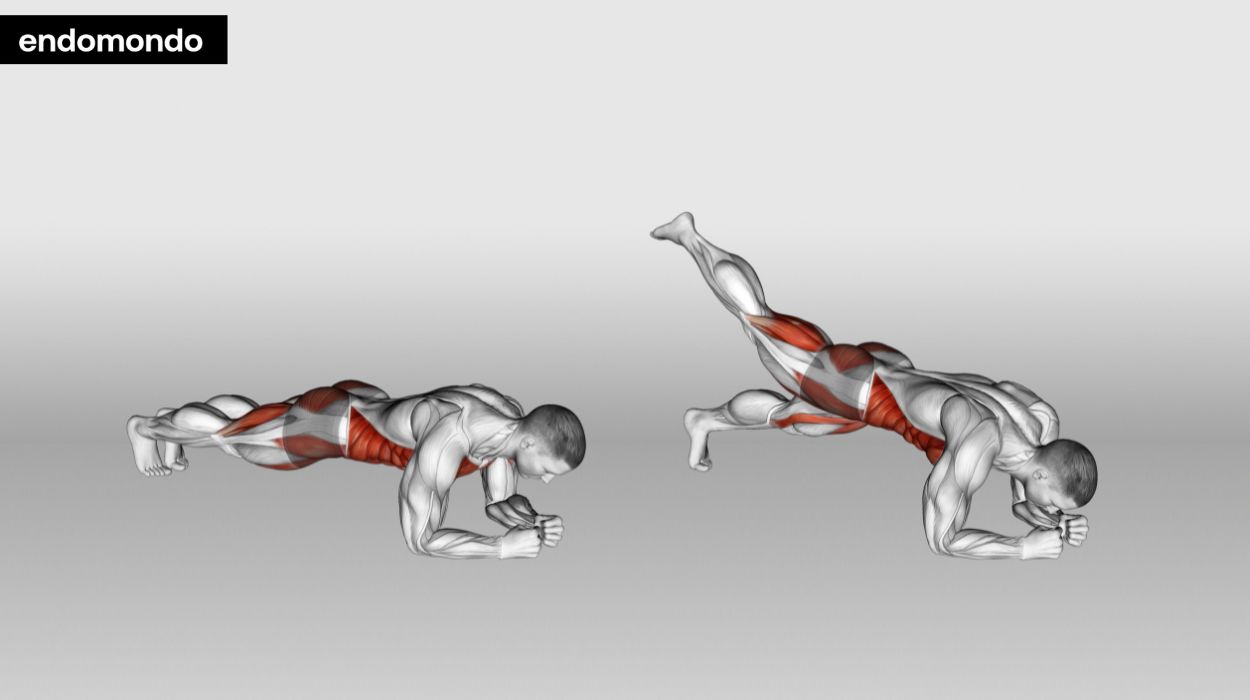
Keeping a strong plank while testing your balance is an additional challenge your body will thank you for.
How to do:
- Start in the basic position and push the ground even harder to elevate one leg from the ground.
- Keep the elevated leg straight and strong, all the way from your sitting bones to your foot, pointing or flexing it.
- If you want to take it to another level, try lifting the opposite arm off the ground and extending through both, your arm and your leg, to maintain balance.
Tips:
- Maintain a straight line from head to the extended leg, engaging your core and glutes.
- Focus on balance and stability while lifting one leg at a time.
- Alternate between legs for an even workout.
Optimal Sets & Reps: 3 sets of 10-12 leg lifts on each side
Plank With A Row
Adding weights to the mix and working your back muscles elevates a basic plank even further. It requires even stronger balance and power as you lift the additional weight while maintaining the same position.
How to do:
- Start in a regular plank and lift a dumbbell off the floor through a pulling motion, keeping your elbow close to your body.
- Exhale and drop it down to the floor.
- Repeat on the other side.
Tips:
- Maintain a strong and stable plank position throughout the exercise to engage your core.
- Focus on squeezing your shoulder blades together as you perform the rowing motion.
- Perform the row with controlled, deliberate motions to prevent swaying.
Optimal Sets & Reps: 3 sets of 10-12 rows on each arm
Plank With Shoulder Taps
Another interesting plank variation that challenges your entire body occurs when you tap your shoulders. It turns the notch on your ab activation and has you fighting to keep your hips level as you transfer your body weight from one palm to the other.
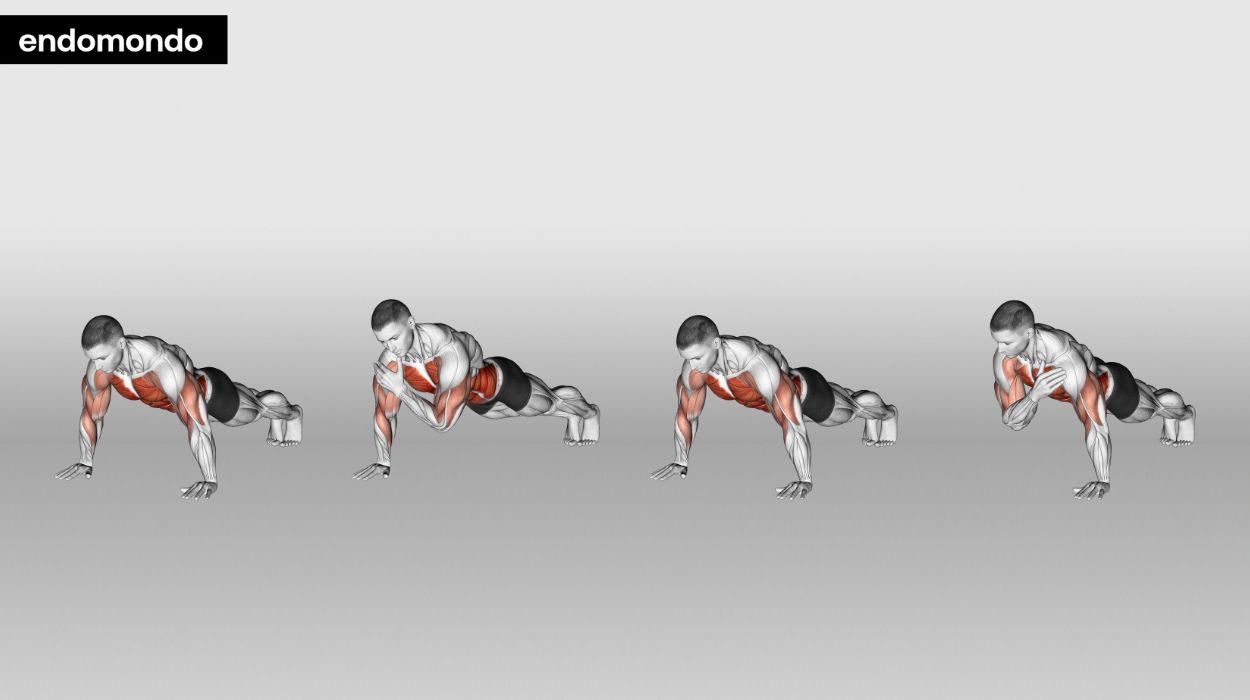
How to do:
- Start in a plank position with hands under shoulders.
- Lift your right hand, tap your left shoulder, and return to plank.
- Lift your left hand, tap your right shoulder, and return to plank.
- Alternate tapping shoulders while keeping hips steady.
- Perform the desired number of taps with controlled movements.
Tips:
- Keep your hips steady and core engaged to prevent swaying while tapping your shoulders.
- Alternate between tapping your left and right shoulder for balance.
- Perform the taps with controlled, deliberate motions to maximize core engagement.
Optimal Sets & Reps: 3 sets of 10-12 taps on each shoulder
How To Perform A Crunch
Crunches, on the other hand, are a more isolating movement than planks, targeting the abs while leaving the rest of the body without much engagement. In order to properly perform a crunch and really activate those abdominal muscles, here’s what you should do:
- Start in a lying position on your back, making sure you’re fully supported and the surface you’re lying on isn’t too hard.
- Bend your knees and place your feet hip-width apart close to your sitting bones.
- Place your hands behind your head and interlace your fingers.
- Pull your belly button up and close up your ribcage so your lower back is flat on the floor.
- Take a deep inhale and exhale by lifting your upper body diagonal into the sky, gazing up and not towards your belly button. Exhale fully and come back down to inhale.
- Repeat 10-12 times.
- Make sure your lower back is fully on the floor so you’re isolating your abs and not crunching with your back muscles. If you can’t feel your back on the floor, place a padded mat underneath your sacrum.
- Additionally, if this is hurting your neck, cross your arms over your chest and touch your opposite shoulders.
Crunch Variations
As mentioned above, there are plenty of crunch variations that will have you working your muscles, and here are some of our favorites:
Bicycle Crunches
An amazing crunch variation that really works your entire core is bicycle crunches. They isolate the abdominal wall while testing your balance and making you engage your hips and lower back as you perform them.
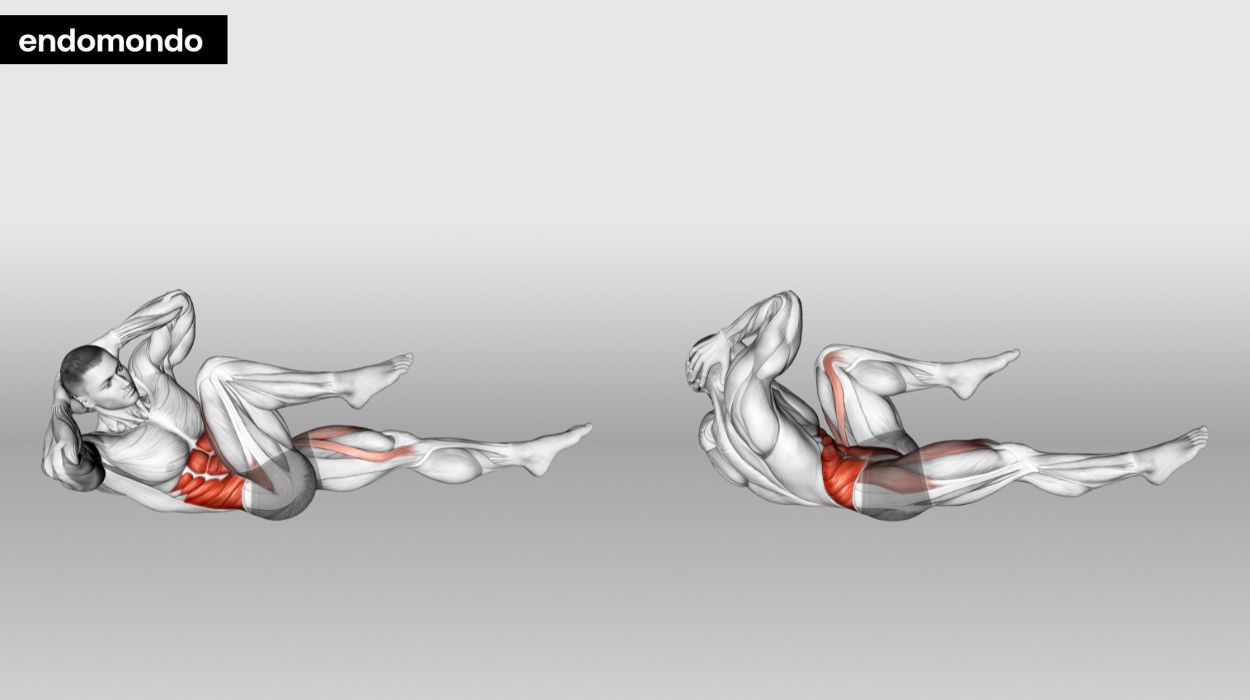
How to do:
- Start on your back, like you’d do in a regular crunch, and extend one leg.
- On your exhale, try to touch your bent knee with the opposite elbow. Inhale to center and switch sides.
- Keep at it, inhaling to center and switching knee to elbow combos on exhale, really squeezing your abs at the end of each exhale.
Tips:
- Twist and bring your opposite elbow to your knee to engage your core effectively.
- Keep your core muscles tight throughout the exercise to stabilize your upper body.
- Perform the exercise with controlled, deliberate motions to maximize muscle engagement.
Optimal Sets & Reps: 3 sets of 15-20 reps on each side
Side Crunches
Target your obliques with side crunches and you’ll feel them sore for days to come.
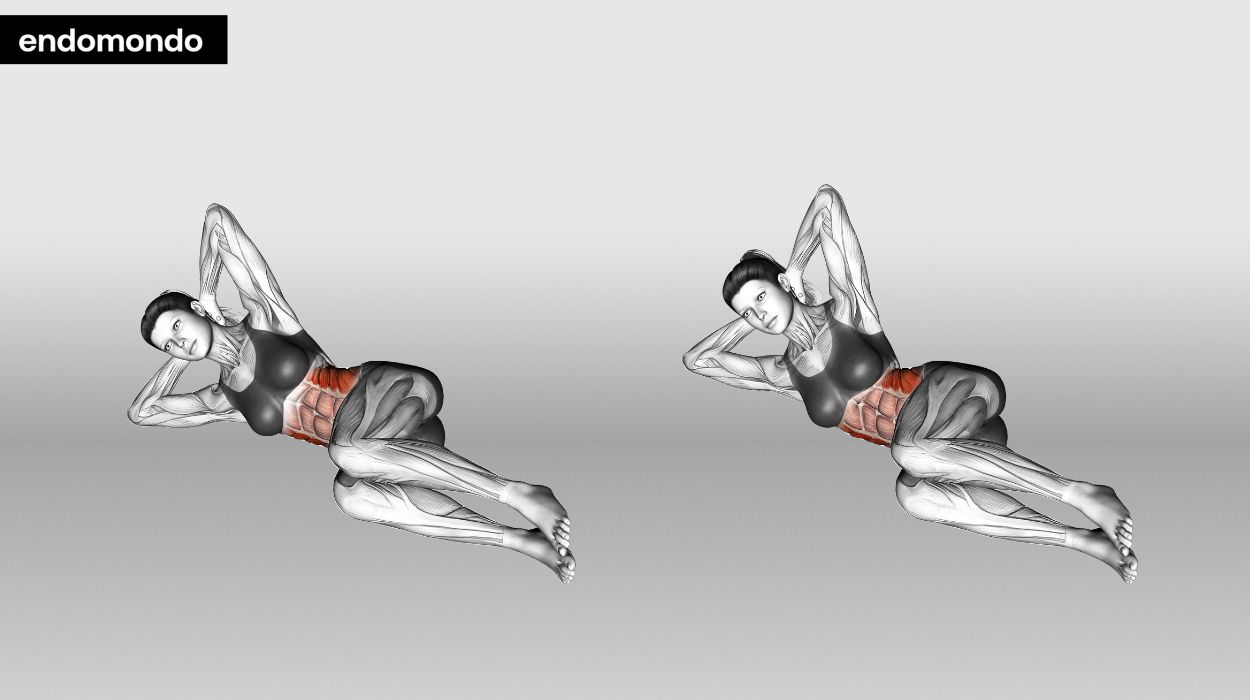
How to do:
- Start by lying on your side and bring your upper arm behind your head.
- Bend your knees in the fetal position and on your exhale, lift your upper body diagonally up, crunching your obliques as you do so.
- Keep your legs on the floor or try to lift your knees up for an additional challenge.
Tips:
- Keep your body in a straight line from head to hips, and focus on lifting your shoulder toward your hip.
- Contract your oblique muscles on the side you are targeting to maximize the effectiveness of the exercise.
- Perform the side crunch with controlled, deliberate motions to avoid straining your neck or back.
Optimal Sets & Reps: 3 sets of 12-15 reps on each side
Scissors (Straight Leg Crunch)
Scissors are an amazing crunch variation, but they do require a higher level of flexibility. You can always modify it by keeping your legs slightly bent.
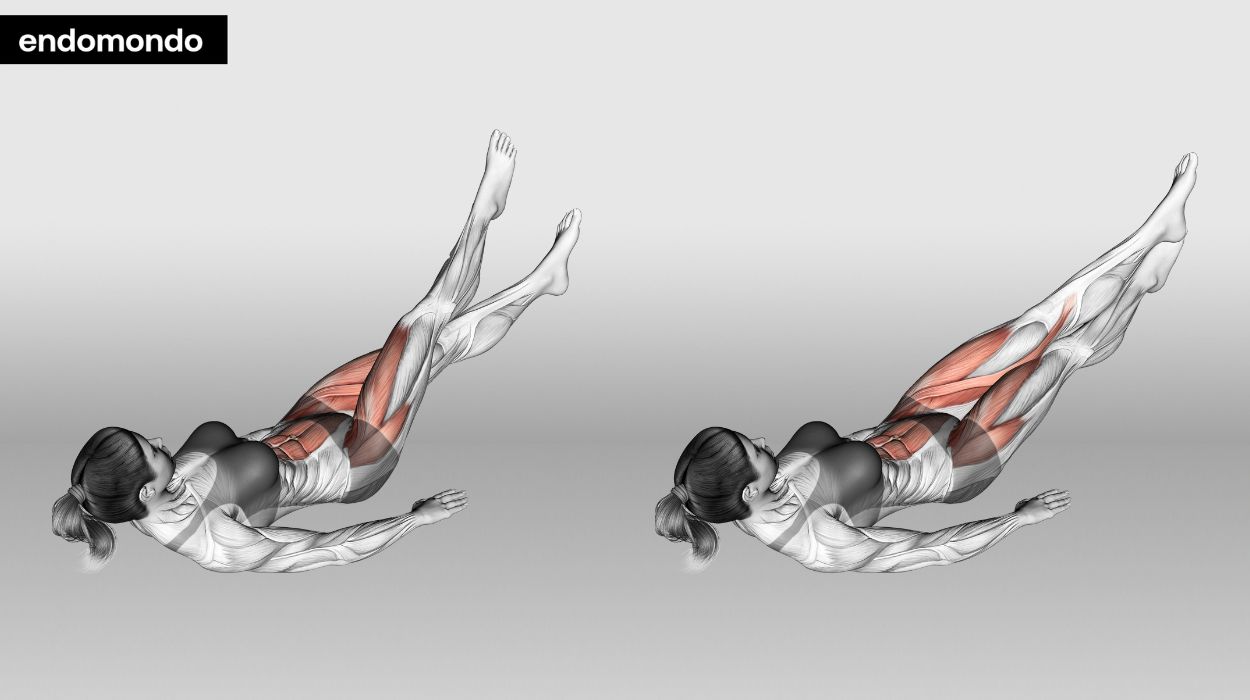
How to do:
- Start by lying on your back, legs extended. Engage your abs by bringing your belly button up and zipping your ribcage, trying to flatten your lower back as much as possible.
- Lift your upper body off the floor and then lift both legs off the floor as well.
- Lower one of your legs and twist your body towards the other. Alternate and scissor your legs, turning towards the upraised leg.
- Repeat 10-12 times.
Tips:
- Keep your lower back pressed into the mat and engage your core throughout the movement.
- Alternate lifting your legs while keeping them straight, targeting your lower abdominal muscles.
- Perform the exercise with controlled, deliberate motions to maximize muscle engagement.
Optimal Sets & Reps: 3 sets of 12-15 reps on each leg
Why You Should Perform These Exercises?
Both the crunch and the plank are a great addition to your fitness routine, no matter what your end goal is: to lose abdominal fat, get stronger abs, burn calories, or build core strength. Since they activate the body in different ways, you can even combine them in the same workout and reap the full benefits.
Conclusion
It’s essential to consider your fitness goals and the specific benefits each exercise offers. Planks engage multiple core muscles and enhance overall functional strength while placing less strain on the hip flexors. Crunches can target specific abdominal muscles for a defined look but should be part of a comprehensive core workout.
A well-rounded workout routine that includes a variety of exercises, along with a balanced diet and consistent physical activity, is the key to achieving your fitness goals without the need for supplements. Remember, consistency and dedication to your fitness journey will lead to the best results over time.
Resources
Endomondo.com refrains from utilizing tertiary references. We uphold stringent sourcing criteria and depend on peer-reviewed studies and academic research conducted by medical associations and institutions. For more detailed insights, you can explore further by reading our editorial process.


